
Traffic is the lifeblood of any online business. The more traffic you have, the more revenue you get. While there are dozens of different ways to drive traffic to your website, SEO is the most effective. This tutorial shows you how to install and configure Yoast SEO (using the best and recommended settings).
If your WordPress-powered website is optimized using Yoast SEO, you can receive literally thousands of targeted visitors every day for free who are ready to buy what you are selling.
Before we dive into the Yoast WordPress SEO plugin settings let’s quickly cover why SEO is so important.
Receiving that amount of free visitors from organic search is what every marketer and business owner dreams of.
But here’s the deal:
Getting there is hard, and it involves a lot of SEO work. You need to handle both on-page and off-page SEO.
A lot of people neglect the importance of good on-page SEO. But believe me, it’s as important as off-page SEO tactics such as linkbuilding.
On-page SEO helps Google know what your content is all about and the keywords you are trying to target.
Now, on-page SEO sounds simple on the surface, but there’s a lot that goes on backstage.
It’s not as simple as adding a few keywords to the title and sprinkling the same keywords a dozen times in the content.
That’s what most people believe on-page SEO is about. But there’s much more to it. More than you can probably handle yourself.
While WordPress out-of-the-box is optimized for search engines like Google, it still lacks a lot of features you need to fully optimize your site for search engines.
For example, WordPress doesn’t offer a built-in way to edit the meta description of your posts and pages.
This is where Yoast SEO plugin for WordPress comes to the rescue.
Yoast is a free WordPress plugin that handles all the technical part of on-page SEO, so you can focus on what you are best at, producing great content.
In this Yoast SEO tutorial, I will guide you through the simple process of installing and setting up WordPress SEO by Yoast plugin.
I often get asked what’s the best and recommended settings for Yoast. This is the exact process and configuration settings I use on every single website I create. So, if you are ready, let’s dive in.
What is Yoast SEO

Yoast SEO is a free WordPress plugin created by Joost De Valk that helps you optimize your website for search engines without writing a single line of code.
The plugin has 5+ million installs, five-star ratings, and handles everything from generating your site’s metadata, XML Sitemap, breadcrumbs to managing redirections.
In short, Yoast makes SEO simple and easy for everyone.
It not only helps you optimize your site for Search Engines like Google, but it also helps you improve the quality of your site’s content.
Yoast SEO is a complete solution. And without Yoast SEO, you will have to install more than a dozen plugins to fully optimize your site for Search Engines.
Installing Yoast SEO plugin
Installing the plugin is a super easy process and doesn’t take more than a minute.
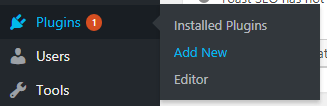
First, log in to your WordPress site’s dashboard. Now, navigate to Plugins -> Add New:
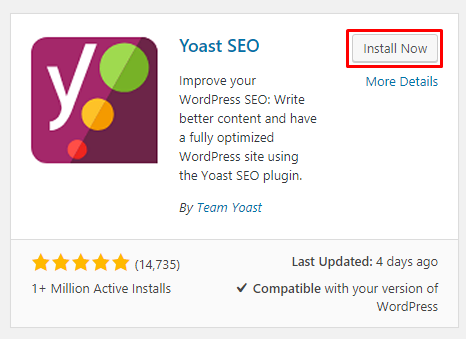
Now, use the search box to search For “Yoast SEO”:

Click the install button on the first result to start the installation process:
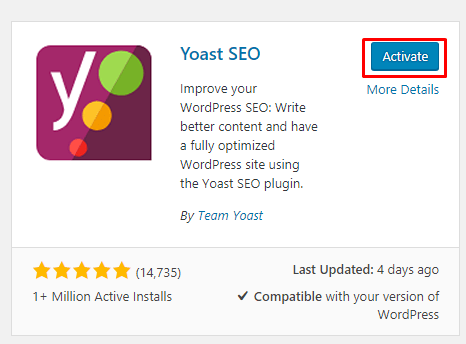
Once the plugin is installed, click the Activate button to activate the plugin:
That’s it.
You just installed Yoast SEO plugin on your WordPress site. Yay!
Now that you have it installed on your site, we can get started setting it up.
In the following sections, I will go over setting up every part of the SEO plugin in detail.
Yoast SEO Dashboard
Once you install the plugin, you will see a new menu item in your WordPress admin sidebar:
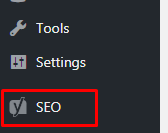
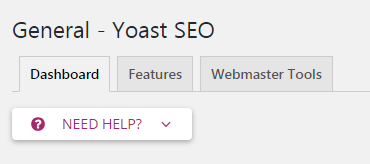
To begin the setup process, click the SEO menu item in your Admin Sidebar. It will take you to the Yoast SEO Dashboard:
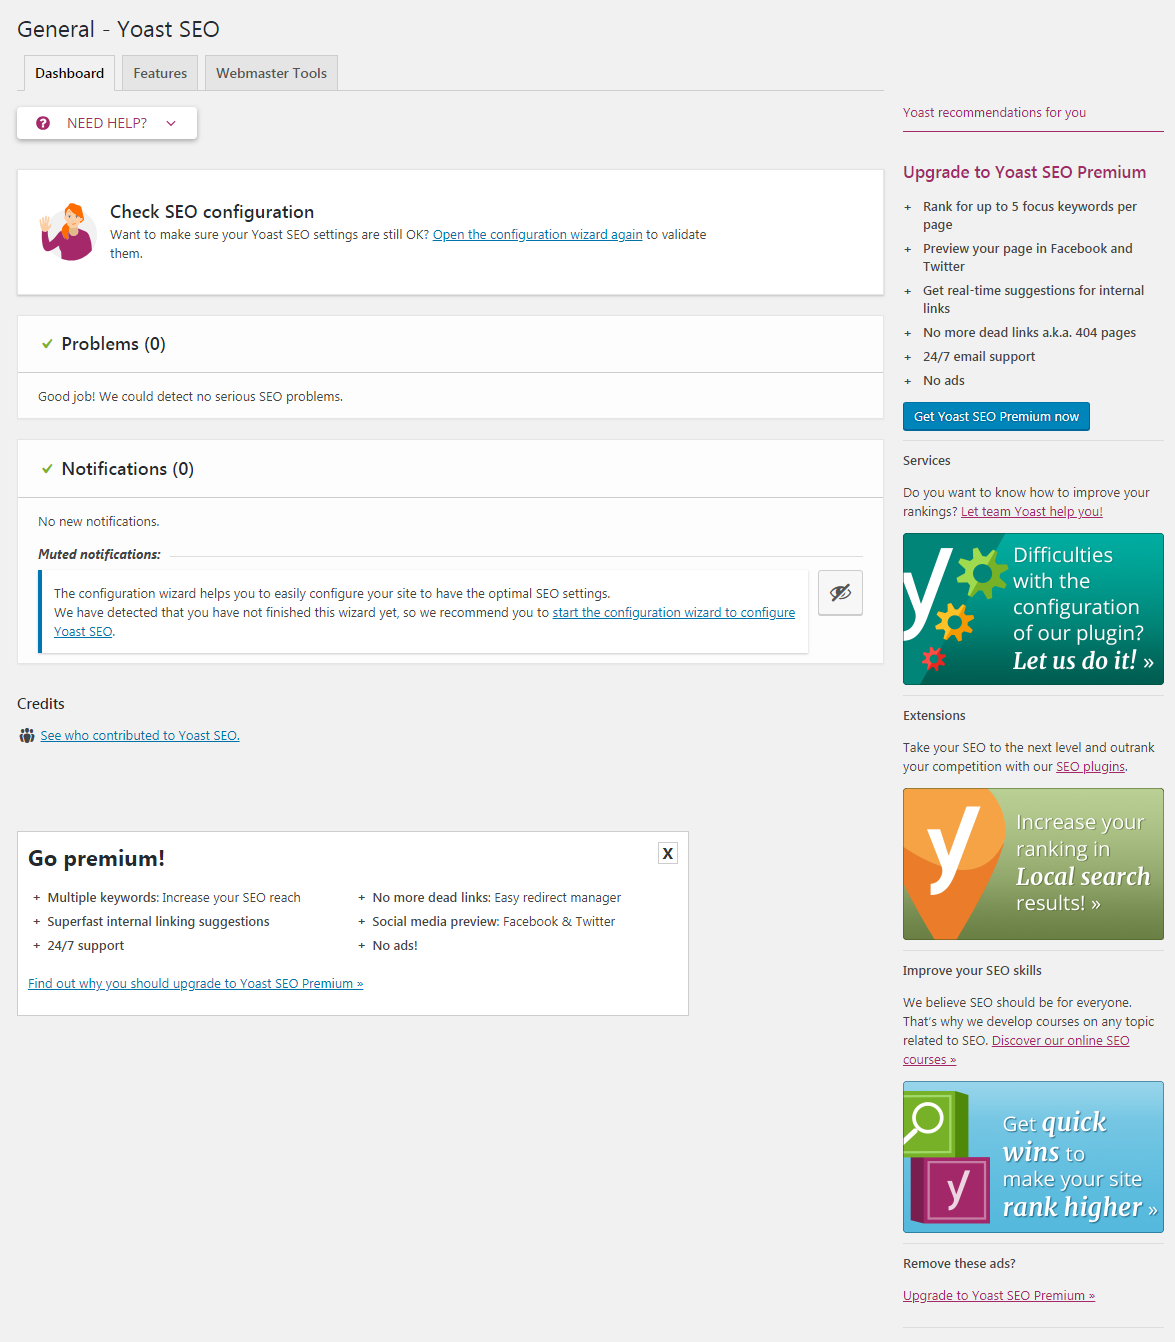
On the Dashboard page of Yoast SEO plugin, you will see two boxes:
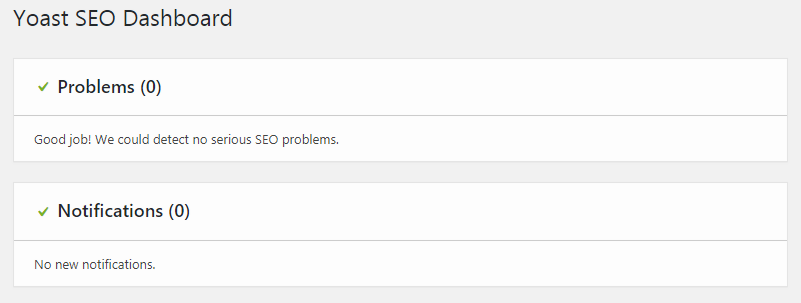
The first one is for alerting you of any SEO problems. If the plugin detects problems with your site’s SEO, they will show up in this box.
The second box is for notifications. These notifications will help you better configure the plugin.
Basic configuration of Yoast SEO plugin
Before I can dive into the advanced settings of this plugin, we need to configure the basic options. In this part of the tutorial, I will guide you through all the tabs of the Yoast SEO dashboard.
The dashboard has 3 tabs:
Yoast Features Tab
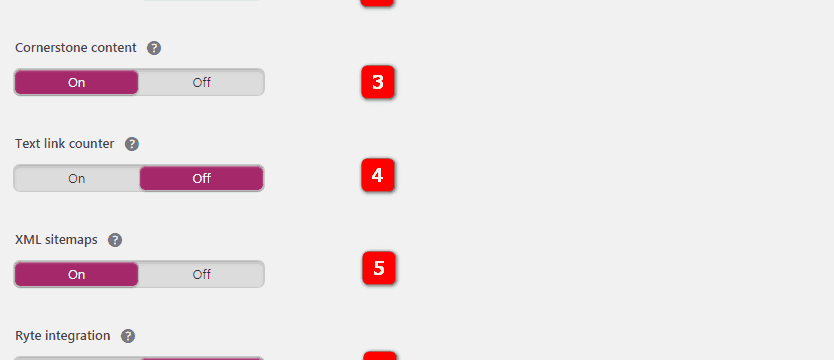
This tab contains 8 features (which you can toggle on/off):
- SEO analysis: The SEO analysis offers suggestions to improve the SEO of your text.
- Readability analysis: The readability analysis offers suggestions to improve the structure and style of your text. You will want to keep this on. It helps a lot when trying to improve the quality of your content.
- Cornerstone content: The cornerstone content feature lets you to mark and filter cornerstone content on your website. If you want to be able to mark and filter cornerstone content (more about that in a later section), you will need to keep this option enabled
- Text link counter: Yoast SEO needs to count all the public links on your website to offer better suggestions for keyword anchor texts.
- XML Sitemaps: Enable the XML sitemaps that Yoast SEO generates (more about XML sitemaps below).
- Ryte integration: Ryte will check weekly if your site is still indexable by search engines and Yoast SEO will notify you when this is not the case.
- Admin bar menu: Adds a menu to the admin bar with useful shortcuts to Yoast SEO settings and keyword research tools.
- Security: no advanced settings for authors: The advanced section of the Yoast SEO meta box allows a user to remove posts from the search results or change the canonical. These are things you might not want any author to do. That’s why, by default, only editors and administrators can do this. Setting to “Off” allows all users to change these settings.
Clicking the question mark gives more information about the feature. If you are a beginner at SEO then I recommend you to keep all of these options enabled.
Yoast Webmaster Tools
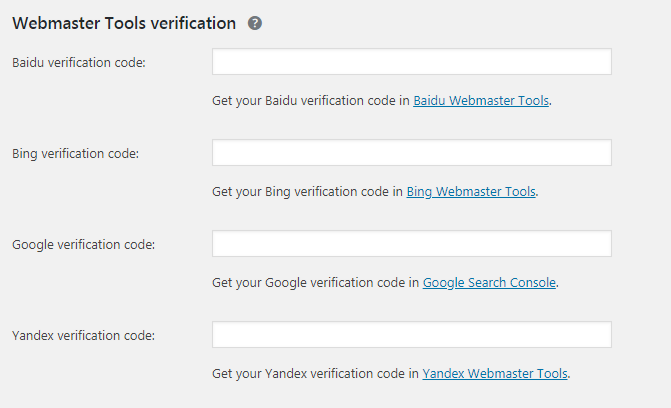
This tab helps you easily verify your website ownership with Google and other search engine Webmaster Tools. This feature will add a verification meta tag on your home page. Follow the links to the different Webmaster Tools and look for instructions for the meta tag verification method to get the verification code.
What are Webmaster Tools?
All major search engines offer free tools for Website Owners to look into the search data for their website. Think of it as Google Analytics but for search.
I will cover how to verify your site using this tab in a later section. If you have already verified your site with Webmaster Tools you use, you can leave these details blank. Verification is just a one-time process.
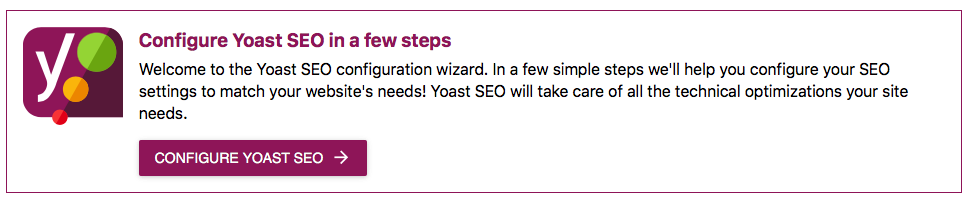
Using the configuration wizard (Optional)
Yoast configuration wizard is the easiest way to configure the plugin. When you use the configuration wizard, you are asked a set of simple questions that automatically configure the plugin for you.
While it’s not the best way to configure the plugin as it doesn’t allow you to change all the settings, it is the easiest way. So, if you are not interested in getting your hands dirty, this is the way out.
To use the Configuration Wizard, Select the SEO menu from the admin sidebar of your WordPress dashboard. Now, navigate to the General tab and click the “Open the configuration wizard” button:
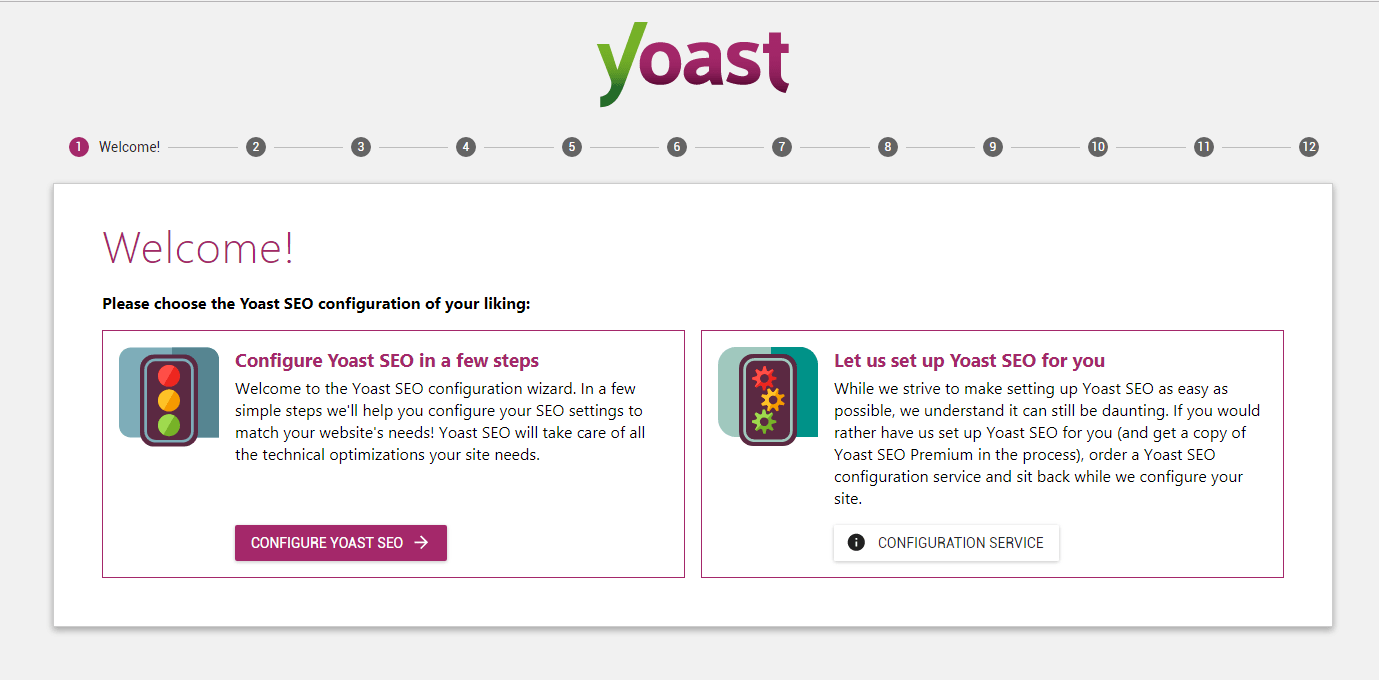
Welcome Screen
You will now see the Welcome screen of the configuration wizard. Click the purple configure button to start the configuration wizard:
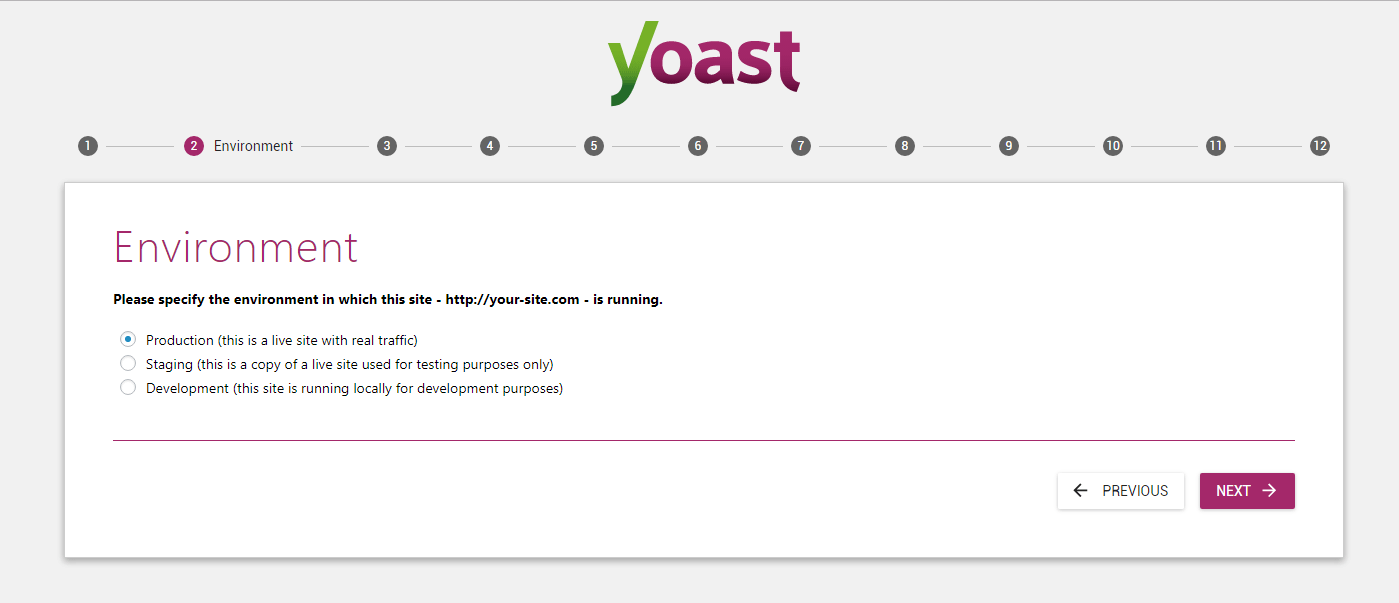
Step 2
Now, select Production as the environment as this is a live site:
Step 3
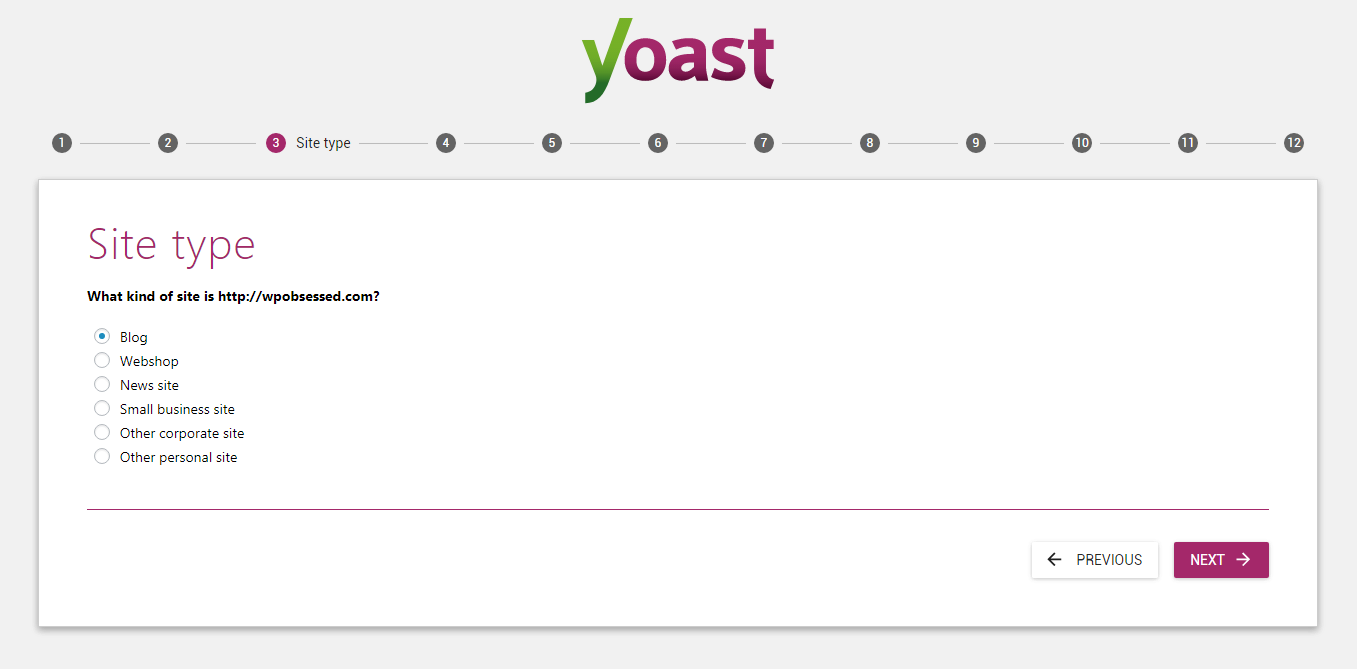
Now, in step 3, you will have to select the kind of site.
Select the kind of site that best suits your site. This will help Yoast SEO better configure the settings for your site type:
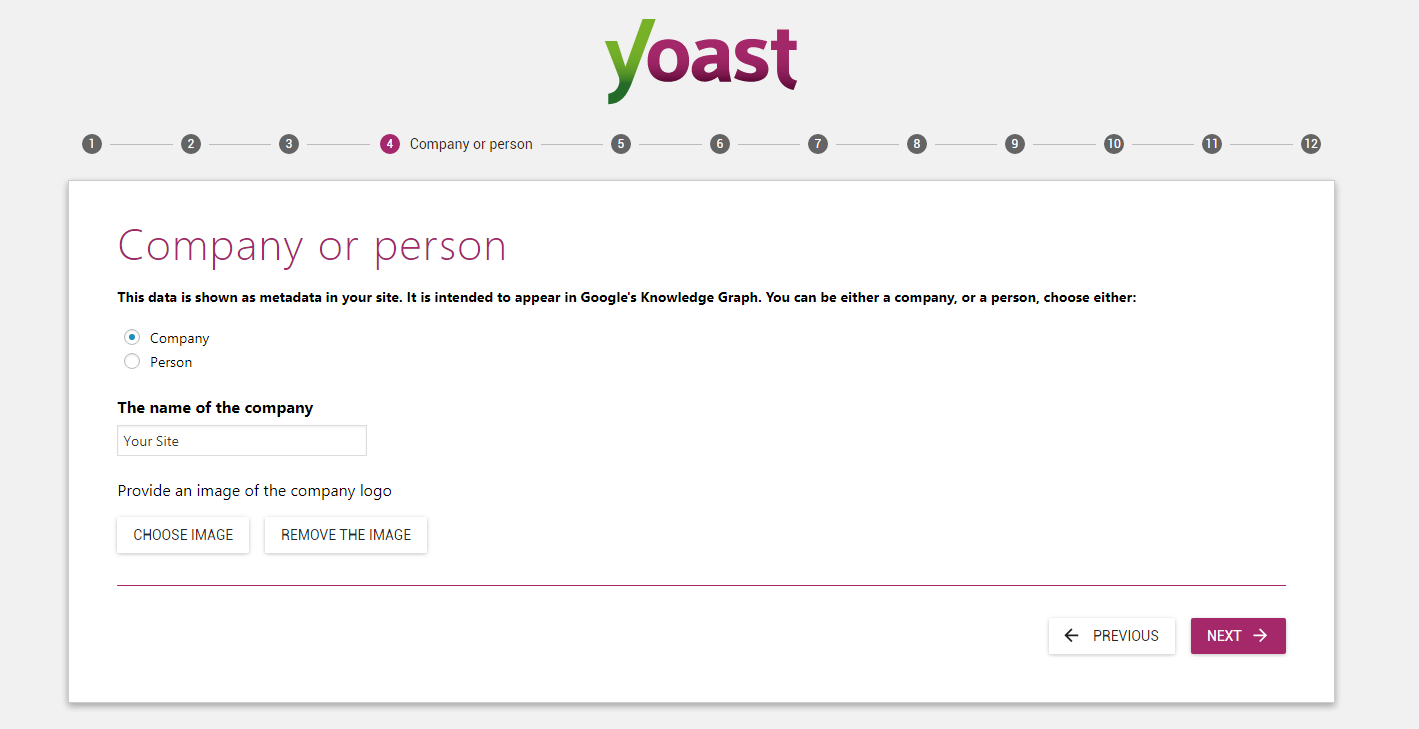
Step 4
In step 4, select whether your website is about a Company or a Person.
If you run a personal site, select Person. After that, enter your or your company’s name and click the next button:
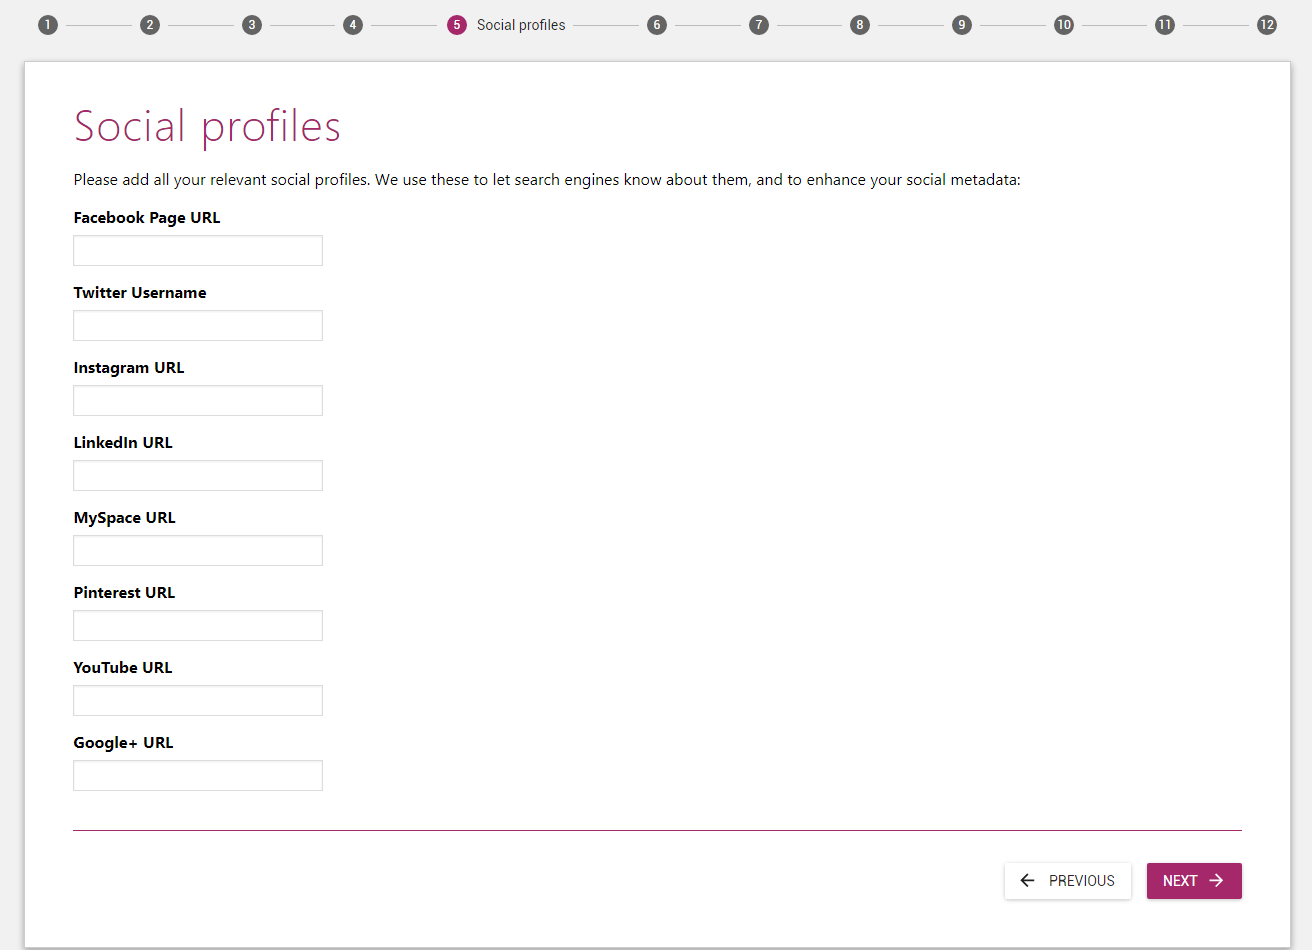
Step 5
Now, the social profiles in step 5 are optional, so you can just leave them blank if you don’t want to link your social profiles to your blog:
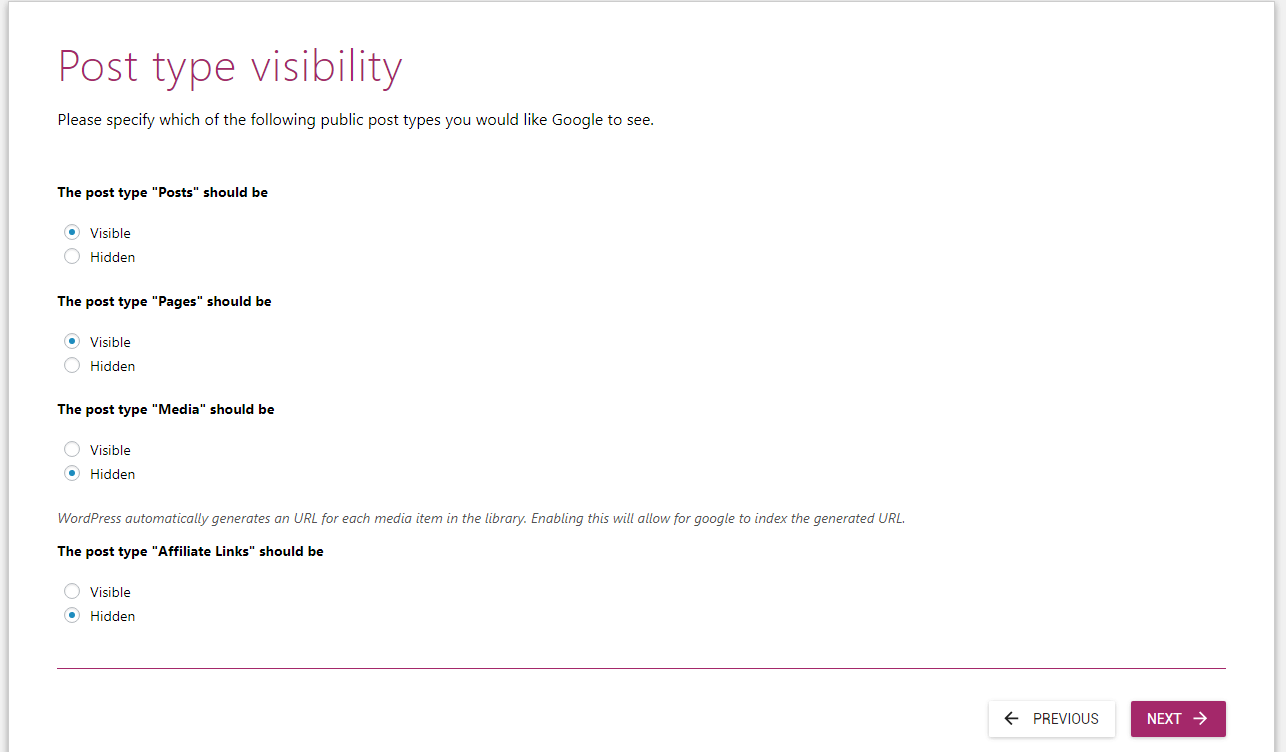
Step 6
In step 6, all you have to do is choose the types of posts you want to be visible to Google (not users.) You will want to leave Posts and Pages visible.
Turn visibility for Media post type to Hidden unless you know what you are doing:
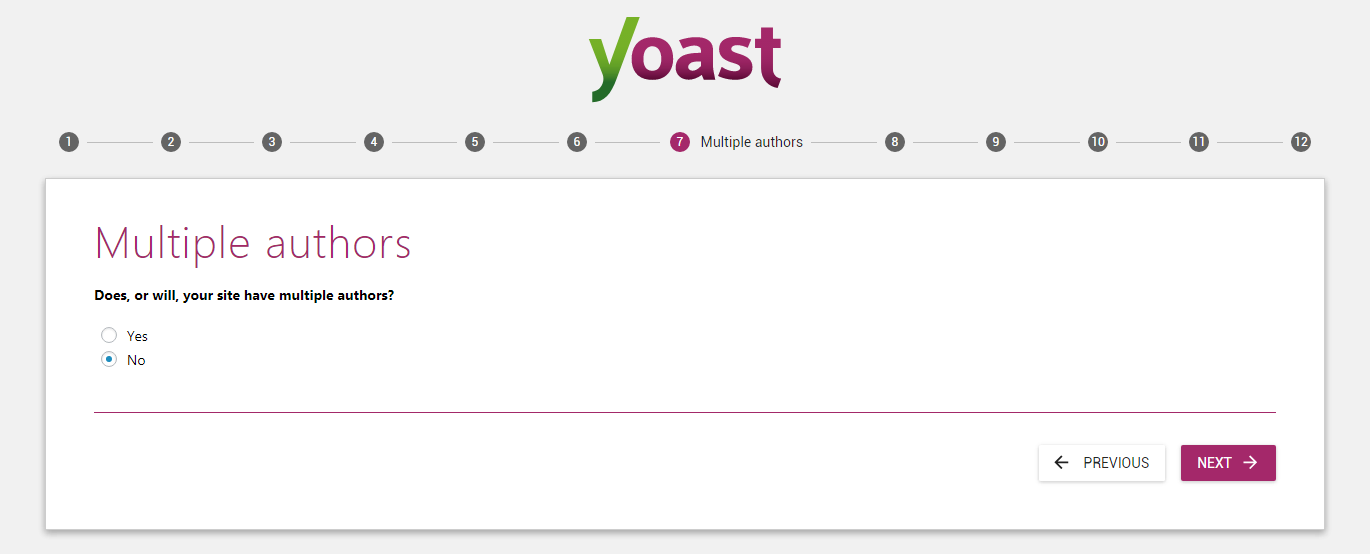
Step 7
Now, in this step, select Yes only if your site has multiple authors. If it’s a personal site, select No as the answer:
Step 8 (Optional)
If you are interested in connecting Yoast SEO to Google Search Console, click the Get Google Authorization Code button:
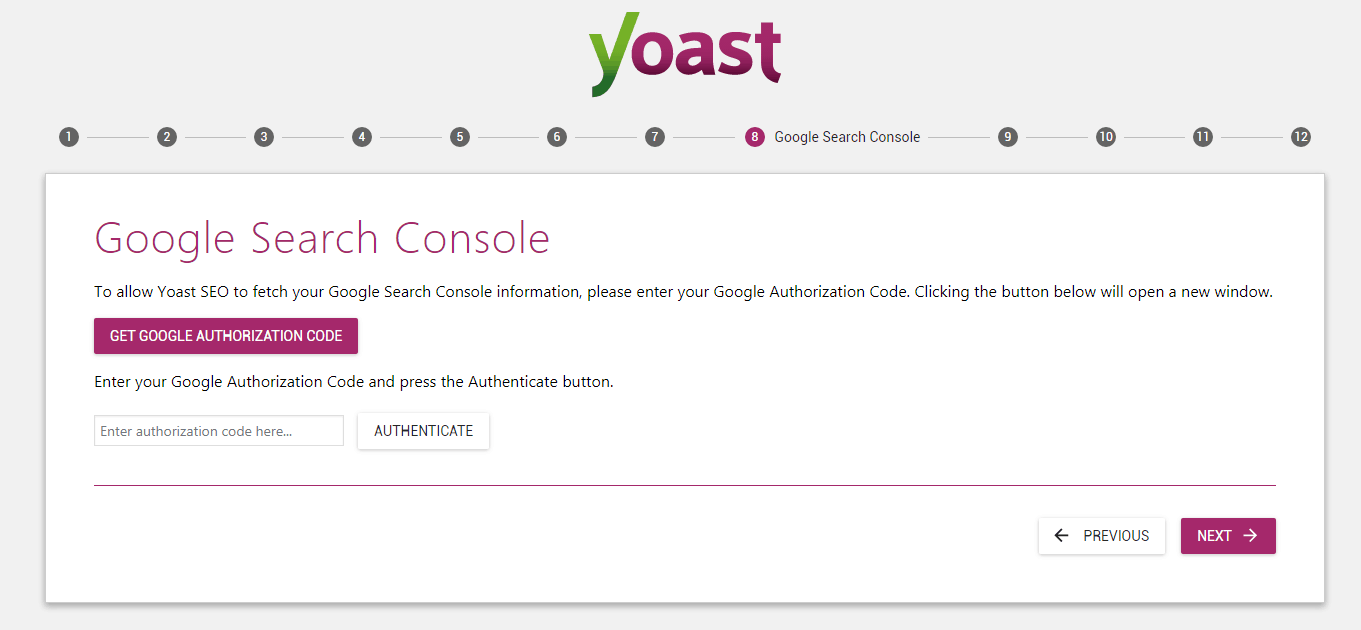
Once you do that, a popup will open asking you for permission to allow Yoast SEO access to your Search Console data.
Once you allow the permissions, you will see an input box with a code, copy it and paste it in the box below the big purple authorization button and click Authenticate.
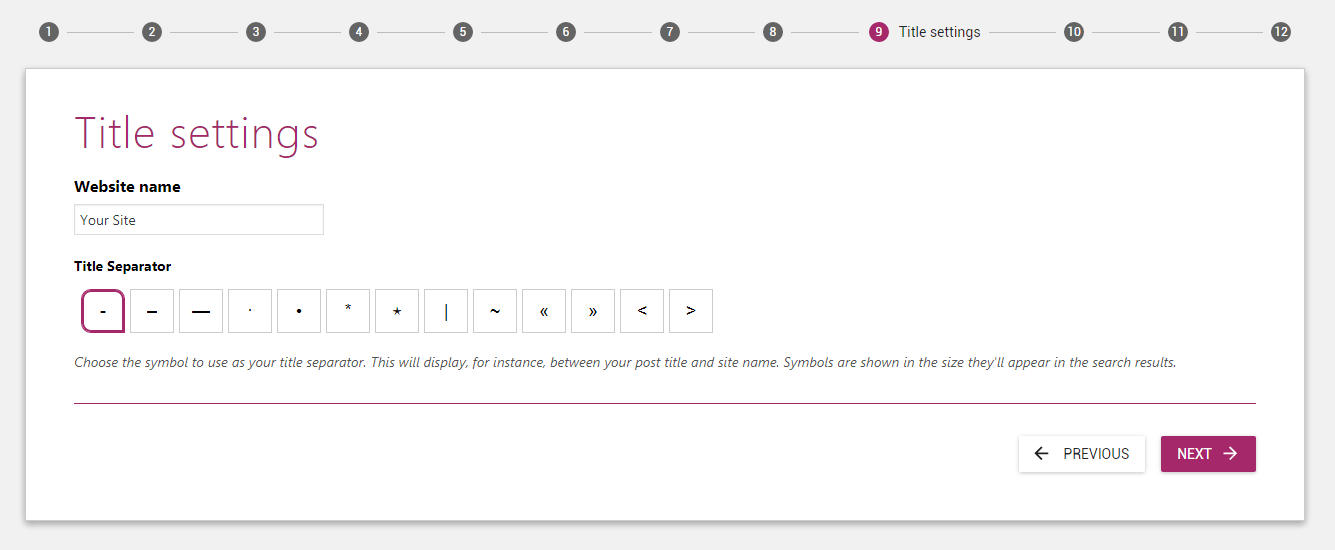
Step 9
Now, all you have to do is enter the name of your website and then select a title separator. The title separator you choose will be used by default:
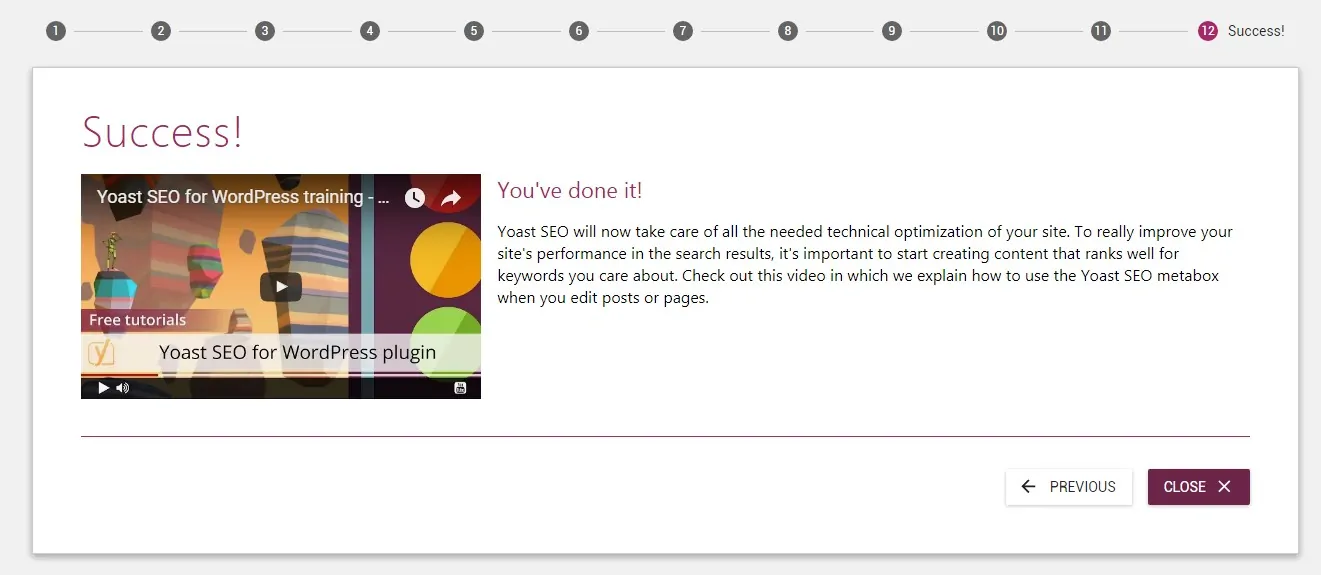
Step 12
Step 10 and 11 are optional. Just skip them and then press the Close button on Step 12 to close the configuration wizard:
Webmaster Tools Verification with Google Search Console
When you sign up for Google Search Console, you are asked to verify the ownership of your website. Verifying your website can be a difficult task if you are not a web developer.
But with Yoast SEO, you can do it in just a few seconds.
Here’s how to do it:
When you sign up for Google Search Console and add your first site, you will see the following screen:
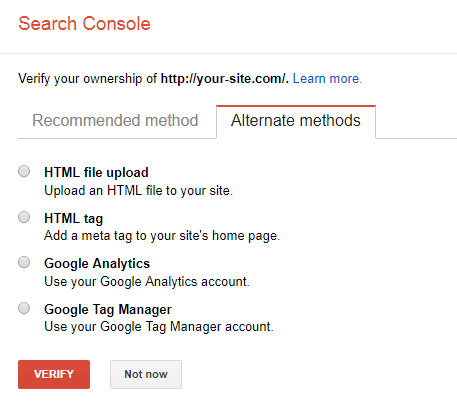
Now, select the HTML tag method to see the HTML verification code.
In the HTML code that you will see, the text in quotes after “content=” is your verification code:
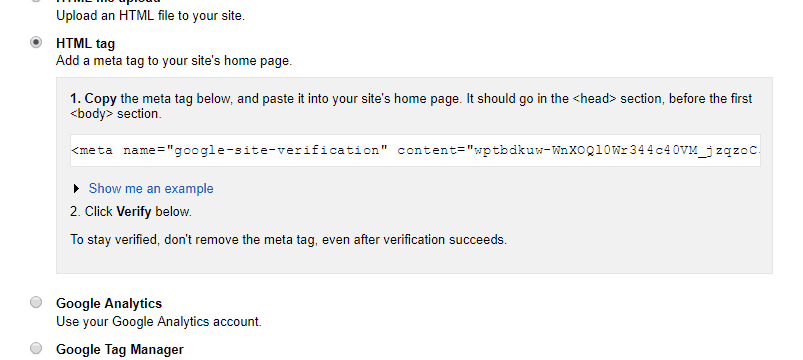
The bold part in the below example HTML code is where your code will be:
<meta name=”google-site-verification” content=”YOUR_CODE” />
Copy the verification code. We will need it in the next step.
Now, to complete the verification process, head to the Yoast SEO Dashboard on your website and select the Webmaster Tools tab:
Now, paste your verification code in the input box next to the “Google Search Console:” link and click Save Changes.
Once your code is saved, click verify button on the Google Search Console Verification page:
If you see an error that Google can’t verify the code is on your site, try again in a few seconds. Sometimes, the changes can take a few minutes.
Configuring Page Titles and Meta Descriptions
WordPress itself doesn’t offer much functionality when it comes to editing the title and meta tags of your pages and posts.
Yoast SEO provides a lot of control over the title and meta of all your website pages.
In this section, I will guide you through configuring the site-wide Title and Meta tags settings.
These settings will just act as defaults and you will be able to override them from the post/page editor.
To configure the site wide Title and Meta tag settings, navigate to Yoast SEO > Search Appearance.
On the Search Appearance settings configuration page, you will see 7 different tabs:
In the subsections that follow, I will guide you through all of these tabs.
Site-wide Title Settings
The first tab of the Search Appearance settings, General, contains only 3 options:
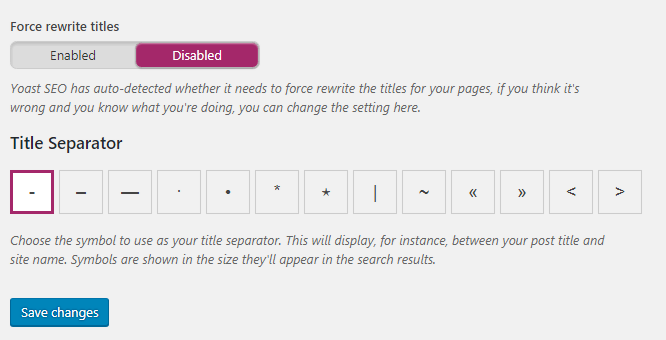
The first option allows the plugin to rewrite the title tags of your theme. You should only enable this option if Yoast SEO asks you to.
If Yoast SEO detects a problem with your Theme’s title tag, it will ask you to turn this on.
The second option allows you to select the default title separator. The separator you select will be used by default unless you override it in the post/page editor.
Dash, the first option, is what I recommend and use.
Editing the Homepage Title
The second tab of the Search Appearance settings, Homepage, contains two input boxes:
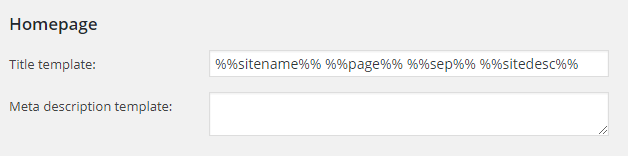
The first one allows you to select a title template for the homepage. If you don’t know how a title template in Yoast SEO works, I would recommend you to leave it to the default option.
The second one allows you to choose a meta description for your website’s homepage. When people see your website’s home page in search results, they will see this description.
Knowledge Graph
This data is shown as metadata in your site. It is intended to appear in Google’s Knowledge Graph. You can be either a company or a person.
Recommended Settings For Post Types
Now, the second tab of the Search Appearance settings, Content Types, allows you to configure the default settings for all the post types on your website.
In this tab, you can choose a default title template, meta description template, and other meta settings. Remember, you can always override these settings from the post/page editor.
In this tab, you will see three sections:
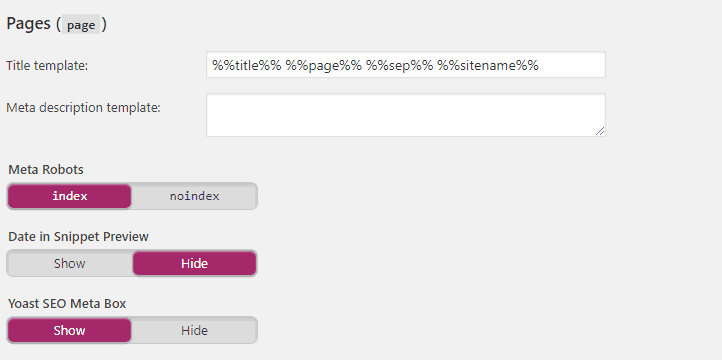
All of these post types have the same five options. Here are our recommended settings:
- Title Template: The title template makes sure you don’t have to start from scratch when writing titles. Unless you know what you are doing, you should leave this to the default setting.
- Meta Description Template: This is the same as the Title Template. Writing a meta description and a title takes time. If most of your posts titles or meta descriptions are similar, you can set up a default template for all your posts. You can leave it blank for now.
- Meta Robots: This is an important option. You can either choose index or noindex as a setting. When you set it to noindex, Search Engines will NOT index this page and will NOT display it in search results. I recommend that you set posts and pages to index, and set media to noindex. WordPress, by default, creates a separate page for all the media (images, videos, etc) you upload to your site. If you set media to index, Google will index all your media pages. So, unless you know what you are doing, set media to noindex.
- Date in Snippet Preview: If your posts display the date they were published, in some cases, Google might display the date of publication below the Title in the search results. Yoast SEO offers a simulation (called Meta Box) of what the snippet for your posts and pages will look like in search results. This option displays the date of publication below the title in the simulation. This option doesn’t really make a big difference. I recommend you to set it to hide.
- Yoast SEO Meta Box: This is one of the most useful features of Yoast SEO. The plugin displays a box called the Yoast SEO Meta Box below post and page editor. This Meta Box displays a simulation of your post’s search engine snippet and offers dozens of options to improve your content and on-page SEO. I recommend you to set it to Show for all post types if you want to enjoy all the benefits of Yoast SEO.
Recommended Settings for Taxonomies
Now, the fourth tab of the Search Appearance settings, Taxonomies, allows you to configure the default title and meta settings for Categories, Tags and Post Format:
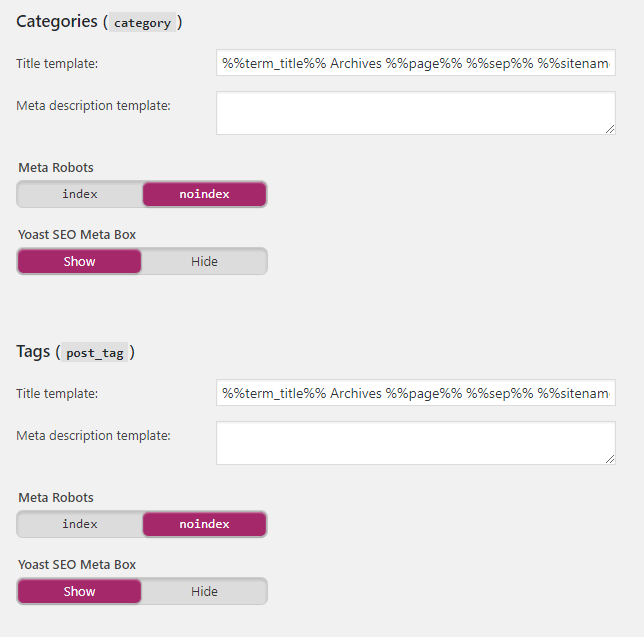
I recommend that you set Meta Robots option to noindex for Categories and Tags. Because these archives can cause duplicate content on your website.
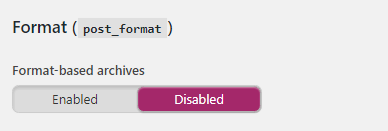
I also recommend that you disable post-format-based archives:
Yoast SEO will use the Title Template and Meta Description Template on the Category and Tags pages. You can leave the meta description template blank as we are not allowing Search Engines to index these two pages.
Recommended Settings For Archives
The archives tab of the Search Appearance settings only has four options.
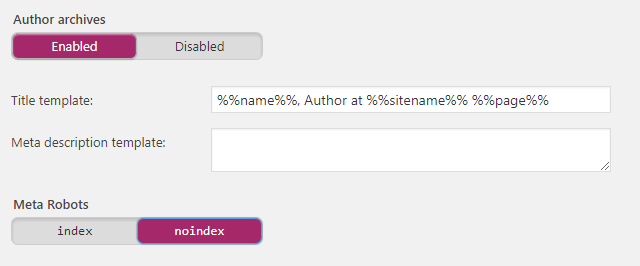
I recommend that you disable Author archives if you only have a single author:
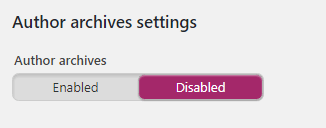
If your blog has multiple authors and you decide to enable author archives, make sure you set the Meta Robots setting to noindex just like you did with Categories and Tags:
This will make sure Google doesn’t index your author pages which might result in duplicate content.
Now, for Date Archives, I recommend that you disable them as they might result in Search Engines seeing those pages as duplicate content:
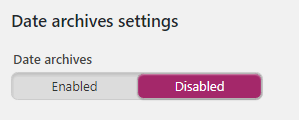
If for some reason you want to enable date archives, just like Author Archives, make sure you set meta settings to noindex to avoid duplicate content on your site.
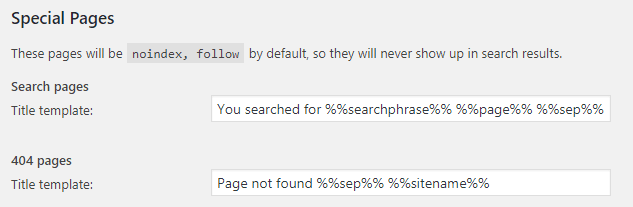
I recommend that you leave the last two options, Search Pages and 404 Pages Title Template, to the default setting:
Recommended Settings For Site Wide Meta
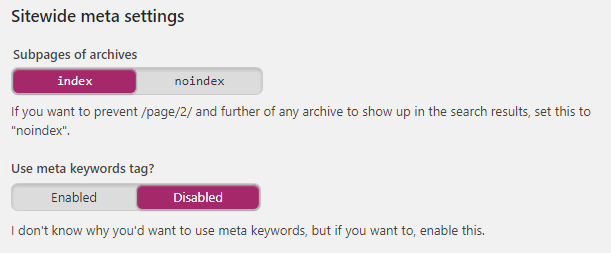
Now, in the Site Wide meta settings tab, I recommend that you set Subpages of archives to index because we want Search Engines to index the subpages of the archives we have enabled.
Important: Do not set this to noindex even if you have all the archives including tags and categories disabled. Because when you do this, Yoast SEO will also set the sub pages of your blog’s main archive to noindex.
At the bottom of the page, you will see an option titled “Use meta keywords tags?” I recommend that you disable this option as they are of no use anymore.
Yoast Search Console
This section will show you crawl errors (404 errors/ broken pages on your site) so you can redirect them to the correct page on your site.
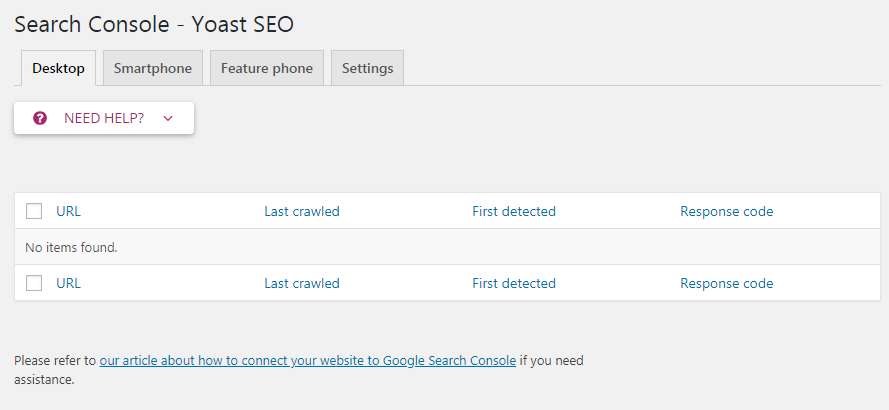
You must add your website to Google Search Console in order to connect and retrieve crawl issues. Here’s an article on how to connect to Google Search Console.
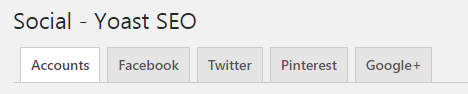
Enabling Social Media
Now that I have covered the Search Appearance settings, I will guide you through the Social Media settings. The social Settings page is located under the SEO menu in the admin sidebar.
There are five tabs on the Social settings page:
Accounts
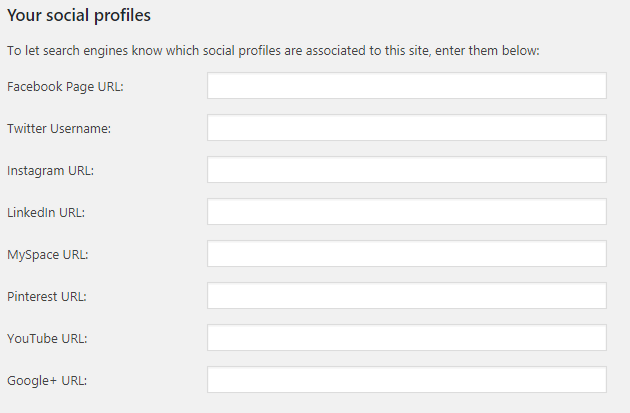
Social Media profiles in this tab allow Search Engines to know which social profiles are associated with your site.
Fill in all the social media profile URLs of your company. If you run a personal site, link to your personal URLs.
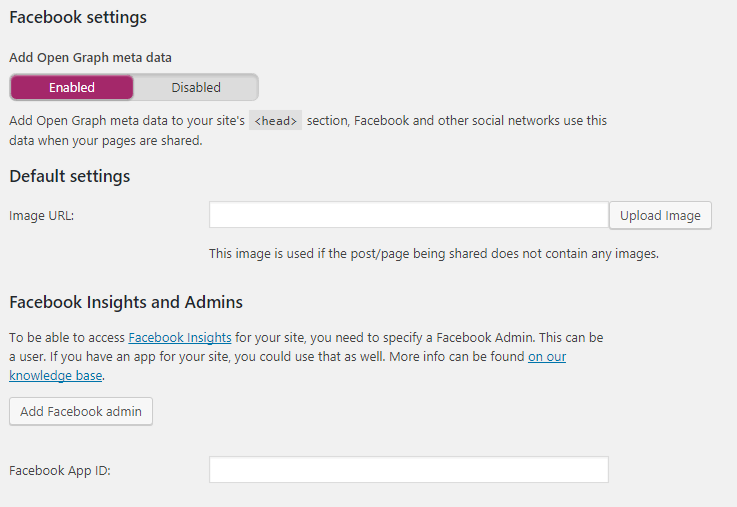
The Facebook tab allows you to set up Open Graph meta data for your site.
Social Networks like Facebook use Open Graph meta data to better understand what your content is about. I recommend you to keep this enabled.
Yoast SEO allows you to choose a default image for pages that don’t have any images. This is the image that will be displayed when someone shares a link.
You can always override this setting from the Post/Page Editor’s Yoast SEO Meta box.
The Facebook Insights and Admins section of this tab is for advanced users and I recommend you to skip it for now.
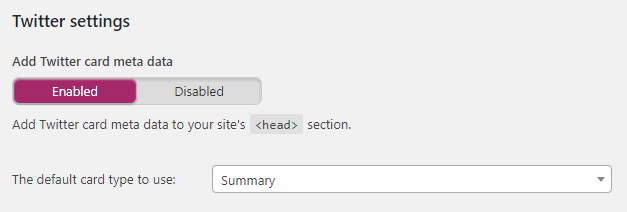
Twitter displays links as cards when they are shared on the platform. This tab allows you to configure the default settings for Twitter card meta data.
I recommend that you keep this enabled.
The second option in this tab is the default card type. If you want Twitter to display a featured image in your link’s card, then choose Summary with a large image.
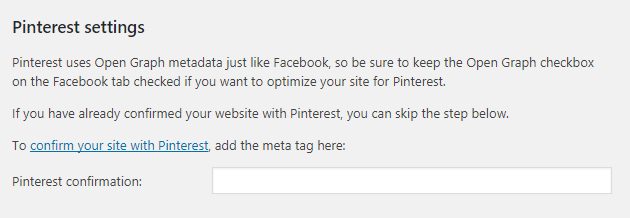
This tab helps you confirm your site with Pinterest.
To confirm your site with Pinterest, follow this tutorial on Pinterest and then enter the confirmation code in the field in this tab.
Google+
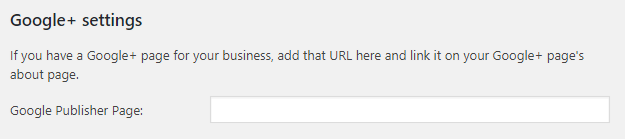
If you enter your Google Plus page URL in this tab and then add a link to your site on your Google Plus page, Google will be able to know that these two are connected to each other.
XML Sitemap with Yoast SEO
XML Sitemaps help Search Engine Crawlers better understand your site. Having an XML sitemap on your site makes sure Search Engines are able to find and crawl your content.
Yoast SEO makes it really easy to generate XML Sitemaps.
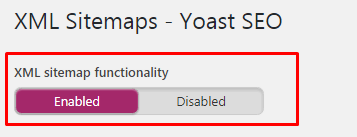
In the Dashboard under the Features tab you will see an option to enable/disable Sitemap Functionality. I recommend that you keep this enabled unless you want to use another plugin to generate XML Sitemaps:
Configuring breadcrumbs and RSS feed settings (Advanced)
Now, we will configure the Advanced Settings of Yoast SEO.
Breadcrumbs (Optional)
If you want to display breadcrumb navigation on top of your articles, you will want to enable this setting.
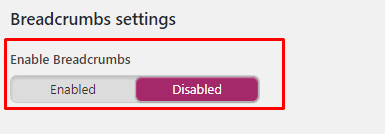
In Search Appearance > Breadcrumbs, you will see the following options:
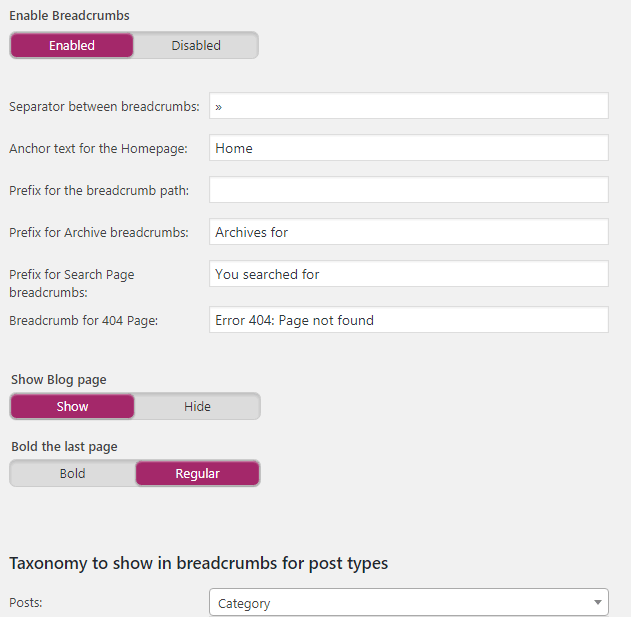
Here are the settings I recommend for breadcrumbs:
- Separator between breadcrumbs: This is the symbol or text that will be used separate the breadcrumbs. Leave it to default.
- Anchor Text For Home: I recommend that you leave this to the default, Home. But if you want, feel free to change it to your blog’s name or anything else.
- Prefix for The Breadcrumb Path: This is the text that will be prefixed before the breadcrumb navigation. I recommend that you leave it blank.
- Prefix for Archive breadcrumbs: You will want to use a prefix for archive page breadcrumbs. I recommend you to leave it the default.
- Prefix for Search Page breadcrumbs: Allows you to add a prefix to the Search Page breadcrumbs.
- Breadcrumb for 404 Page: This is the breadcrumb that will be displayed on your 404 error pages.
- Show Blog Page (Optional): You will see this setting only if you are using a custom home and blog page. I recommend that you enable this setting.
- Bold The Last Page: I recommend that you set this to regular.
Now, at the near end of the page, you will be asked to select a Taxonomy to show in breadcrumbs for Posts. I recommend you to select Category as the taxonomy unless you know what you are doing.
Note: Breadcrumbs are not supported by all themes. You might have to manually add the code that enables breadcrumbs to your theme. Read this article for instructions.
RSS
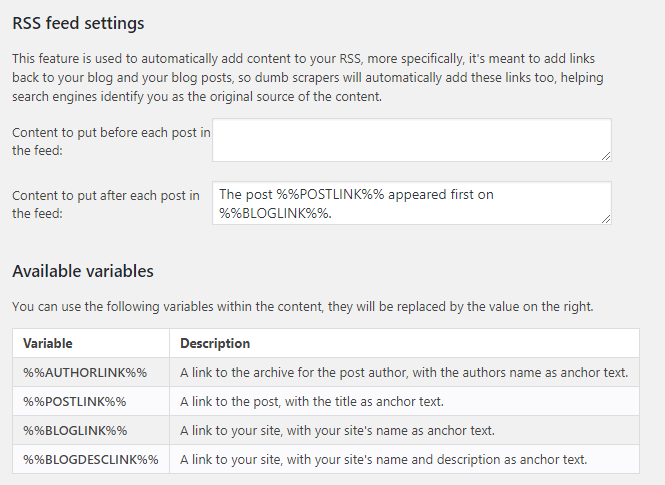
The options under the RSS tab allow you to put content before and after each post in the feed. This is fairly technical and I don’t recommend you to change these settings unless you really know what you are doing.
Using the Bulk Editor and Other Tools
Yoast SEO comes with some very powerful built-in SEO tools:
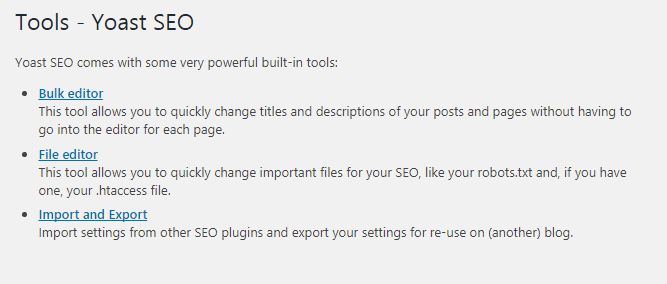
Yoast SEO offers the following three built-in tools under SEO > Tools in the admin sidebar:
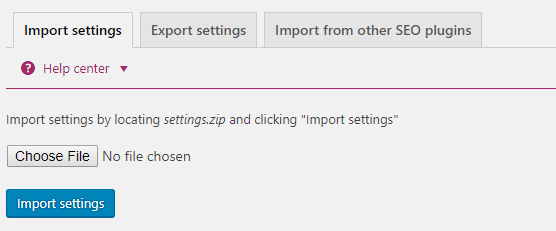
Import And Export
This tool helps you import and export the settings for Yoast SEO. It also allows you to import settings from other SEO plugins.
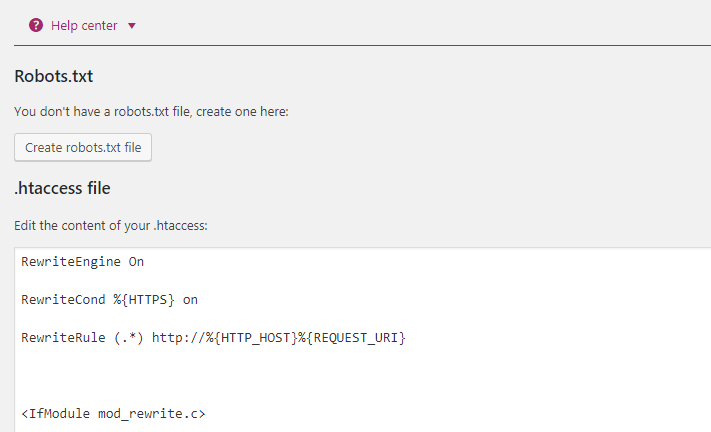
File Editor
The File Editor allows you to make changes and edit the content to your robots.txt and .htaccess file. It also allows you to create a robots.txt file if you don’t already have one.
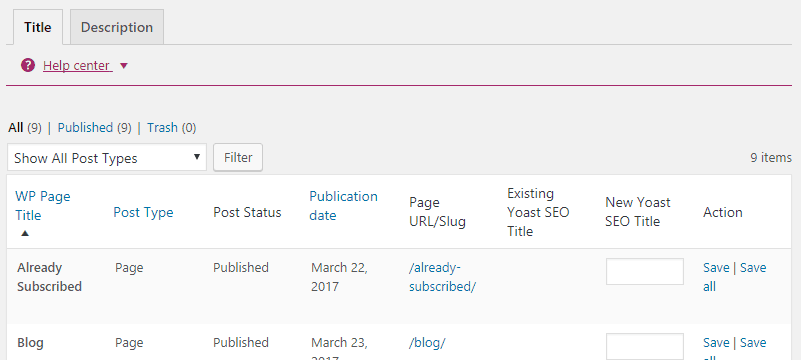
Bulk Editor
This tool helps you mass edit the Page Title and Description of multiple posts and pages at once. Instead of going through all your posts one-by-one, you can use this tool.
Yoast Extras (Go Premium)
While Yoast SEO is available for free, there’s a premium version available that offers, even more, features and premium support.
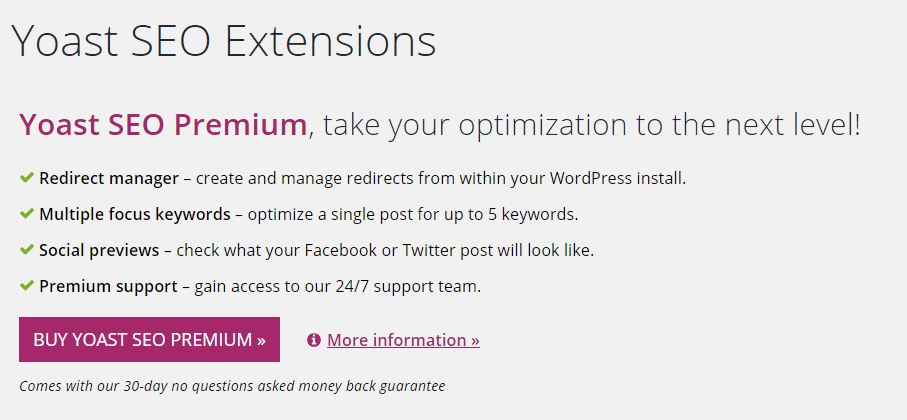
Yoast SEO Premium is $89 per year and if you decide to upgrade to Yoast SEO premium these are one of the many extra features you will get:
Redirect Manager
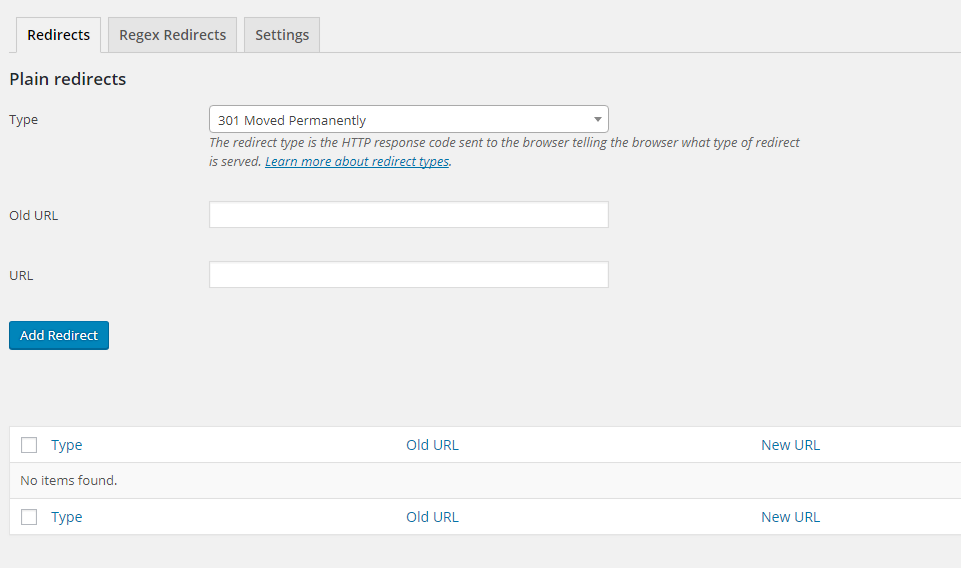
The redirect manager is a handy tool that helps you create redirections on your website.
There are a lot of cases when you will need to create a redirection. For example, you might need to redirect an old or broken page to a new one.
Multiple Focus Keywords

The free version of Yoast SEO only allows you to choose one Focus Keyword. But with the premium version, you can choose multiple Focus Keywords.
This will allow you to increase the chances of targeting multiple keywords with your content.
Social Previews
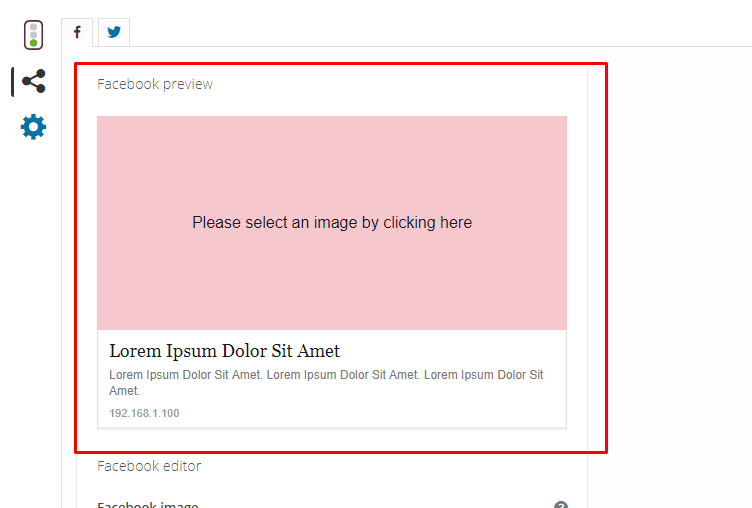
Yoast SEO displays a meta box right below the post editor. This meta box displays a simulation of what your page might look like in Search Results.
Just like that simulation of Search Result snippet, Yoast SEO premium allows you to see a simulation of what your posts might look like when shared on Facebook and Twitter.
Optimizing Content and Onpage for SEO with Yoast
The preview box that appears right below the post editor helps you improve the readability of your content and OnPage SEO.
This is one of the best features Yoast SEO has to offer.
It offers simple instructions to help you better optimize your content for readers and search engines.
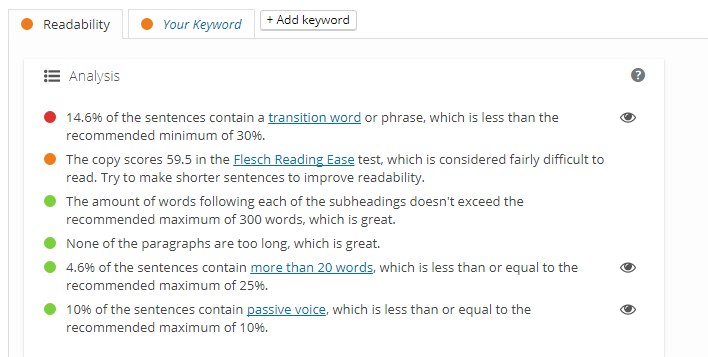
As you can see in the above screenshot, there are two tabs, the Readability Tab and The Keyword Analysis Tab.
I will explore both of those in the below subsections that follow.
Improving Content Readability with Yoast
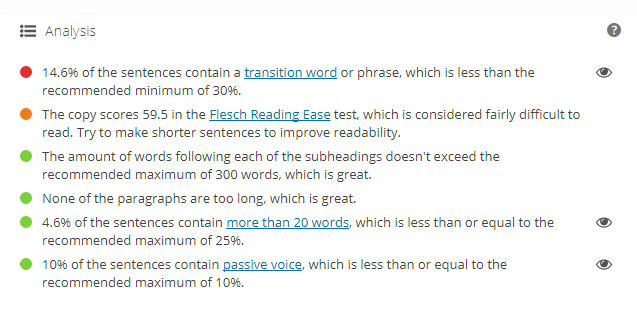
The readability analysis tab of the Yoast SEO Meta Box will help you improve the readability of your content.
Every time you make changes to your content, Yoast will reanalyze the post and display readability improvement suggestions. It will also give your article a readability score. The score will be displayed as a light in the Readability tab.
If the light is green, then your article is Good but if it is red, then you need to work on it.
When you try improving the readability of your content, don’t try to be a perfectionist. Even if your score is OK (Orange), you have done a great job.
What matters more than a perfect readability score is you actually publishing your content. And if you try to be a perfectionist before publishing a post, you might never come to the last step of actually publishing the post.
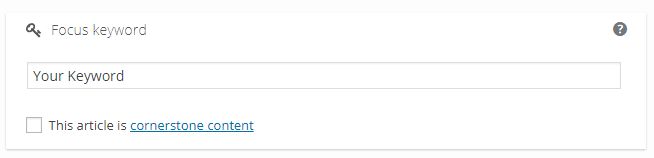
Keyword Analysis with Yoast SEO (focus keywords)
The Keyword Analyzer of Yoast SEO is one of its best features.
It helps you improve the chances of your article targeting the right keywords.
To use the Keyword Analyzer, all you have to do is enter a target keyword in the Focus Keyword box of the Keyword Analysis tab:
Once you do that, Yoast will start displaying simple suggestions to help you improve your OnPage SEO:
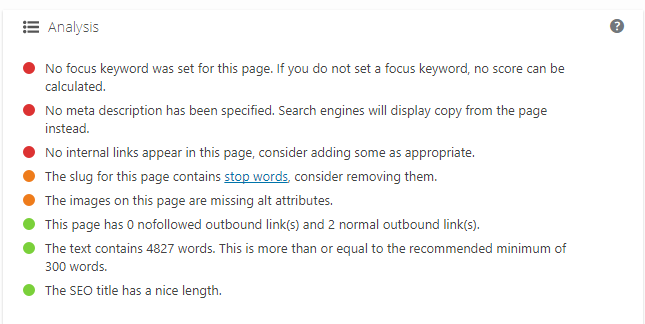
Now, once again, just like the readability score, don’t try to be a perfectionist. Just make sure your post is OK (Orange) in terms of OnPage SEO.
Wrap Up
I hope this article helped you install and set up the Yoast SEO WordPress plugin on your site. This is the exact process I use when I set this plugin up on my sites.
If this article helped you out then please leave a comment and let me know what you think.